


- Feb 14, 2014
Pie is perfect anytime of year! In Spring, I always want something bright, fresh and slightly tart like lemon meringue and rhubarb. Summer is all about the bounty of fruit and you can never go wrong with a great peach or berry pie. By Fall I want rich, warm and spicy; I use things like plums, apples, figs, pears, pumpkin and pecans. Winter is about celebration and decadence - chocolate usually takes center stage.
Most people eschew making a pie because they are afraid of making the crust. For many, it all just seems so mysterious & how, oh how, do you achieve that perfect balance of buttery, tender and flaky? We are here to help! With these our recipe and these tips, you will master gluten free pie crust in no time.
 1. Who Put The Flake In Flaky?
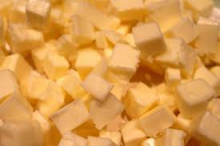
COLD FAT!! Whether you are using butter or shortening or lard, make sure the fat is well-chilled and cut into small pieces. Maintaining some of the integrity of the fat while mixing is the key to achieving a flaky crust. Starting with very cold butter makes it easier to keep from overworking the butter into the dough. If it's hot out, you might even want to freeze the dry ingredients for 10 to 15 minutes before starting the dough.
 2. No Mindless Mixing
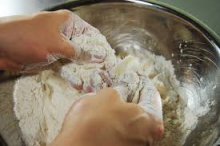
I know, you just can't help yourself. You get your hands in that bowl of butter and flour and just mix and mix and mix. Pretty soon, the flour is quite yellow, a little greasy, and all the butter has disappeared. Guess what? Chunks are ok! While many recipes call for you to work the fat into the flour until the mixture resembles cornmeal, this will yield a more tender, melt-in-your-mouth kinda dough. For optimum flakiness, there should still be a few larger chunks of fat left.
 3. Wetter Is Not Better
To begin, use the minimum amount of liquid called for in the recipe. In traditional pie dough, water aids the development of gluten. And although this is not a problem we gluten free folks have, a drier pie crust is still superior in texture. So, add just enough water (or other liquid) so the dough holds together when pinched between your fingers. The dough will look quite shaggy.
 4. Start Round, Stay Round
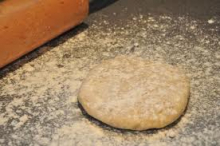
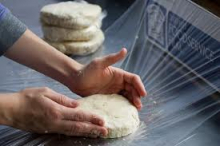
Before you wrap and chill the dough, take the time to shape it into an even disk less than an inch thick. This will make the dough much easier to roll out quickly and evenly.
 5. Chill It Out Before You Roll It Out
It is important to chill the dough for at least 30 minutes before you roll it out. It is next to impossible to roll a sticky, warm dough. Why bother? However, it can also be equally tricky to roll a very cold, brittle dough. We find letting the dough sit on the counter, post chill, for about 10 minutes before rolling yields a better result. The butter in the dough becomes a little more pliable and less prone to cracking. Also, if it is really warm out, keep a cookie sheet in your freezer. If your dough starts getting too warm, place the frozen sheet on top for a few minutes and then proceed.
 6. Flour Power
I do not know when people became afraid of using dusting flour (in our case, Sweet Rice Flour). Be messy, be liberal, sprinkle the stuff everywhere and don't think twice about it. There is no point in rolling out the crust successfully if you cannot get it off the counter. So, roll out the dough on a very well-floured work surface with a well-floured rolling pin. You can always brush off the excess flour before putting the dough into the pan.
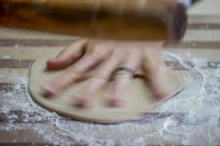 7. Keep it Moving
Imagine a clock face on the surface of your dough. With each pass of the rolling pin, turn the dough about 5 minutes. Constantly moving the dough in tiny increments will help keep the dough round, will ensure the dough is not sticking and will compensate for any unevenness of pressure on your part. If you give the dough quarter turns or larger, you will almost always roll a square.
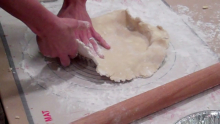 8. Let The Crust Fall Where It May
Gently lower the dough into the pie pan and let it settle into the bottom and corners as opposed to pulling or forcing it. All the wasted effort on your part usually results in a dough that breaks or tears.
9. Yes, Chill Again
It is worth it, I promise. Do not go directly into the oven with you lined pie pan. Cover and chill the dough first. It will make it easier to blind bake and you will get a flakier crust.
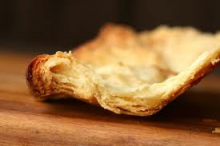 10. Color Equals Flavor
There is an odd trend towards bland, pasty, under-baked pie crusts. I don't like it. And it comes as no surprise that people do not like the crusts they are eating. To get the flakiness and flavor out of you pie crust, be sure to bake the crust until browning occurs. In addition to properly cooking the crust, you can give your pie that burnished look by using a glaze. Since the sugars and proteins in the glaze will caramelize before the crust itself, I put the glaze on in the last 10-20 minutes of baking.
 Find our products
 FAQs
FAQs Testimonials
 R&D Projects